
How to Set Up an Online Survey in Apricot Software
You don’t need supplemental survey tools if you use Social Solutions Apricot™ software. Use Apricot’s secure web form feature to collect survey responses from clients, participants, or stakeholders, and then analyze the survey results using Apricot custom reports and graphs.
Step 1: Create a Tier 1 form
The first step is to create a form in Apricot that will collect your survey data.
The survey must be a Tier 1 form because secure web forms are limited to Tier 1 forms.
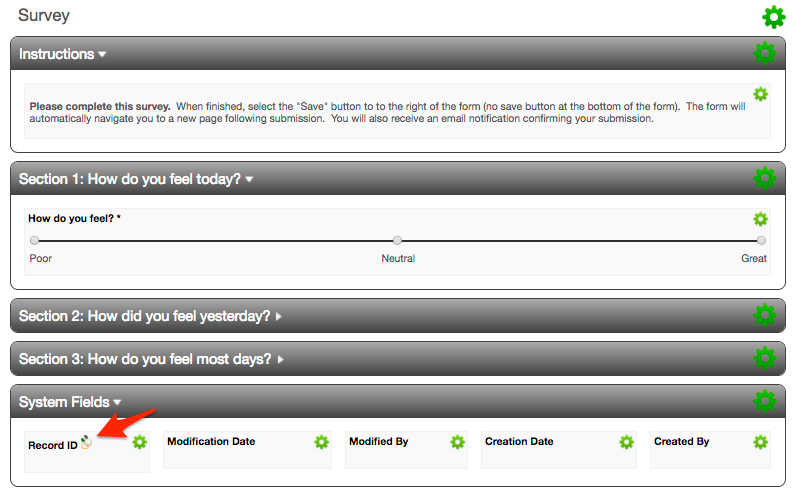
Create a new Tier 1 form and add fields to your form as questions in your survey. Consider these additional design elements.
-
1. Instructions
Add a blank section at the top of the form. Drag an HTML label field to that section and add instructions to the field. Don’t forget to add instructions on how to save a response because the “Save” button isn’t at the bottom of the form (like most online surveys).
-
2. Reportable fields
If you intend to aggregate and analyze the results of the survey, add dropdown, radio button, checkbox, and number fields as questions. Minimize the use of text boxes and note fields, which are difficult to display in a report.
-
3. Sections
Break up data entry with sections, especially long surveys.
-
4. Email triggers
If you prefer to be notified about a new survey response or if you want the person filling out the survey to be notified after completing a survey, add one or more email triggers to the form.
-
5. Form logic steps
Add headers to each section of your form to identify steps: Step 1 of 5, Step 2 of 5, and so on. Use form logic to show new steps in the form only when the last field in the previous step is complete. The form will dynamically show the path to completion as the user fills out the form.
-
6. Duplicate check field
Set the duplicate check field as the Record ID of the form. This will allow unlimited data entry from new survey respondents.
Step 2: Publish Tier 1 form as a secure web form
Designing the form is the most time consuming part of this process.
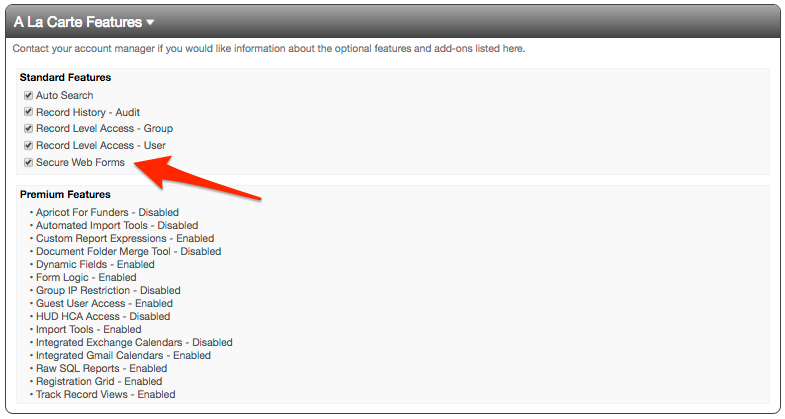
Publish as a secure web form after the form design is complete. You may need to activate secure web forms by going to Apricot Settings and checking the box in the “A La Carte Features” section.
We recommend that you create a separate user account for “Web Form Users.” This user account should have a single permission set that allows “View” and “Create” access to secure web forms ONLY. Although this method reduces your user seat count by one, this is the best way to guarantee that secure web form users are segregated from your larger user pool and that their settings will not be altered inadvertently by an administrator.
Step 3: Embed form in website or save hosted URL
There are two options for publishing an online survey to your website. You can embed the secure web form into an existing page of your website using the embed code (an iframe) or you can link to the form using the hosted URL provided by Social Solutions.
-
1. Embed form in website
A user that completes a form embedded on your website will feel like they are still on your website. Although the secure web form carries some formatting from the Apricot software interface with it, users will navigate to a web page that exists on your website and within your web domain (even though the form is framed into the page).
-
2. Link to hosted page
A user that completes a form hosted by Social Solutions will navigate away from your website via a link (or they may never go to your website to access the form in the first place). Secure web forms don’t allow any custom styling so the form will look as if the user is completing the form in Apricot itself. This is the easier of the two options to implement.
Step 4: Develop survey analytics report
Before you send your survey to potential respondents and start collecting responses, build an analytics report for your survey. This is often a forgotten step in the process.
-
1. Summary section
Create a report section at the top of the report to display the number of responses submitted for the survey.
-
2. Global values
Add two global values to the top of the report: Start Date and End Date.
-
3. One section per question
Add one report section per survey question.
-
4. Select fields for each section
Add the Record ID, creation date, and survey question for each section.
-
5. Group by response
Group the report section by the survey question field column. This will show the number of responses by field value (i.e. the survey responses).
-
6. Add global filters
Add global filters to each section of the report based on the Creation Date. Set the Start Date and End Date global values as the date range of for the filters.
-
7. Set to show graph
Set each report section to show the graph. Set a graph that matches the analytics needed for that survey question (e.g. pie, bar, or other).
Step 5: Distribute survey URL and analyze results
The final step is to distribute the survey and analyze the results. How you distribute the survey will depend on your target audience for the survey. Because the survey is hosted online, provide the link to your target audience in an online format. This will allow them to quickly click the link and complete the survey.
-
1. Use email marketing software to distribute
Send the URL for the survey in an email marketing campaign to your target audience. If you’re interested in learning how to integrate email marketing software with Apricot software, contact us to learn about our integration solutions.
-
2. Use personal email to distribute
Send the URL for the survey in a personal email or in an email trigger from Apricot software. This is a one-off solution and isn’t time effective if you need to send the survey to many people.
-
3. Add a prominent call to action on website
Add a clickable link on your website where website visitors can access the survey and complete it. This is best if the survey is publicly accessible and not specific to a target audience like clients, donors, or volunteers. If the survey is open, make it accessible on your website.
-
4. Include survey access during your program's workflow
An alternative to mass distribution of your survey is to send the survey at the end of a program or service workflow. You could even send the survey to volunteers at the end of their tenure with your organization or after an event. Email triggers can automate survey distribution in these situations.
Can Apricot replace other survey software?
Apricot software can replace other survey tools you may be familiar with like SurveyMonkey®, but Apricot software isn’t as feature rich as other survey tools. You may need to complete a quick pros and cons list to compare SurveyMonkey® and Apricot software based on your survey’s requirements.
Should you decide to use SurveyMonkey or another survey tool outside of Apricot software, you can import responses from external tools into your Apricot database for analysis and storage. This is particularly helpful if an external tool has features that Apricot doesn’t have or you need to capture survey data for Tier 2 forms in Apricot software (because Tier 2 forms cannot be used as secure web forms).
Need help building your survey? Contact us and we will build it for you.
Free Download
The Essential Kit to Apricot Best Practices
- 3x PDF Guides
- 2x Template/Worksheet
- 1x 60-minute Webinar
- ( checklist + slides )
Join the 250+ users that already got their kit!
DOWNLOAD NOW