5 Steps to Get New eTapestry Users Up and Running
We are often asked what an organization should do when onboarding new eTapestry users.
- What are the steps to take?
- What will help new users succeed?
- How much should be invested in new user onboarding?
This article starts with the basics, outlining a five-step roadmap for any organization welcoming new eTapestry users to their team.
If you are new to eTapestry or you are the new user that is just getting started with your organization’s database, check out this article on tips for new eTapestry users.
1. Create a new user login
Although you may be hesitant to let new users into eTapestry right away, we recommend new users log in, take a look around, and start generating a list of questions. This starts the learning process.
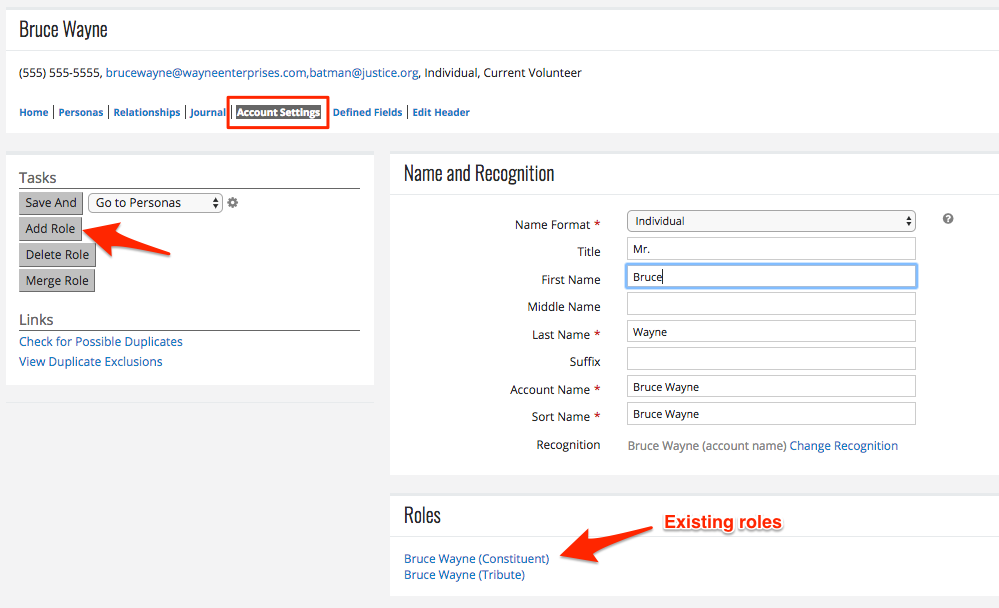
An account can have Constituent, Tribute, and User roles.
If the new user has an existing account (with Constituent or Tribute roles), add the User role to their existing account. This is done from the Account Settings page (see screenshot below).
If the new user is a brand new account in your eTapestry database, follow these instructions:
- Select Add an Account from the Account menu
- Uncheck constituent and select User
- Select name format of Individual and complete the fields provided
- Create the Login ID as their email address
- Set a temporary password (they will reset it the first time they log in)
- Click “Save and” on the top left
Every new user account is automatically added to the Default security group (more on that in the next step). If you have any hesitations about the new user’s ability to access the database, leave them in the Default group for the time being.
2. Set up security groups if the user needs special permissions
What is the new user’s role in the database and what kind of access do you want them to have?
- Are they a new administrator?
- Will they be in charge of your donor communications?
- Are they a new volunteer that is helping you do prospect research?
The role the user plays in eTapestry will determine their access.
Standard eTapestry security groups include:
- Admin—providing full access
- Default—providing general data entry rights; but no admin permissions, reporting, or access to advanced features
- View Only—providing no access to modify or edit records and limited access to most database features (this is not a standard security group, but we recommend adding this security group to your database)
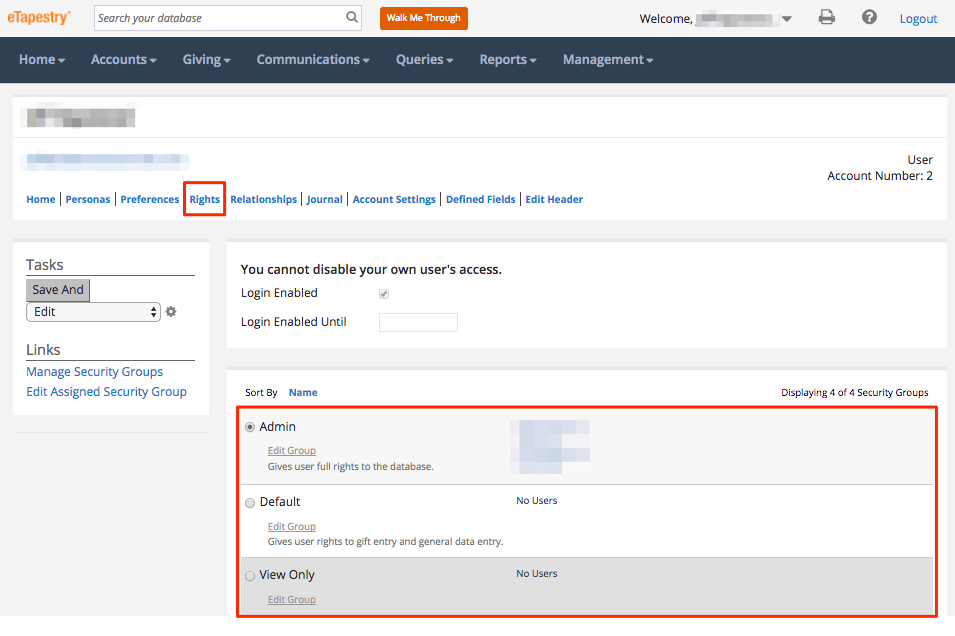
You will need to create custom security groups for situations in which a user needs more access than what’s allowed in the Default group, but less access than what’s available in the Admin group.
Copy an existing security group and customize the new group to match access for the new user if an existing security group doesn’t match the new user’s requirements.
3. Streamline the user experience
Encourage a new user to modify their home screen, account summary page, and journal view. Changes to each of these features will enhance the overall user experience of eTapestry.
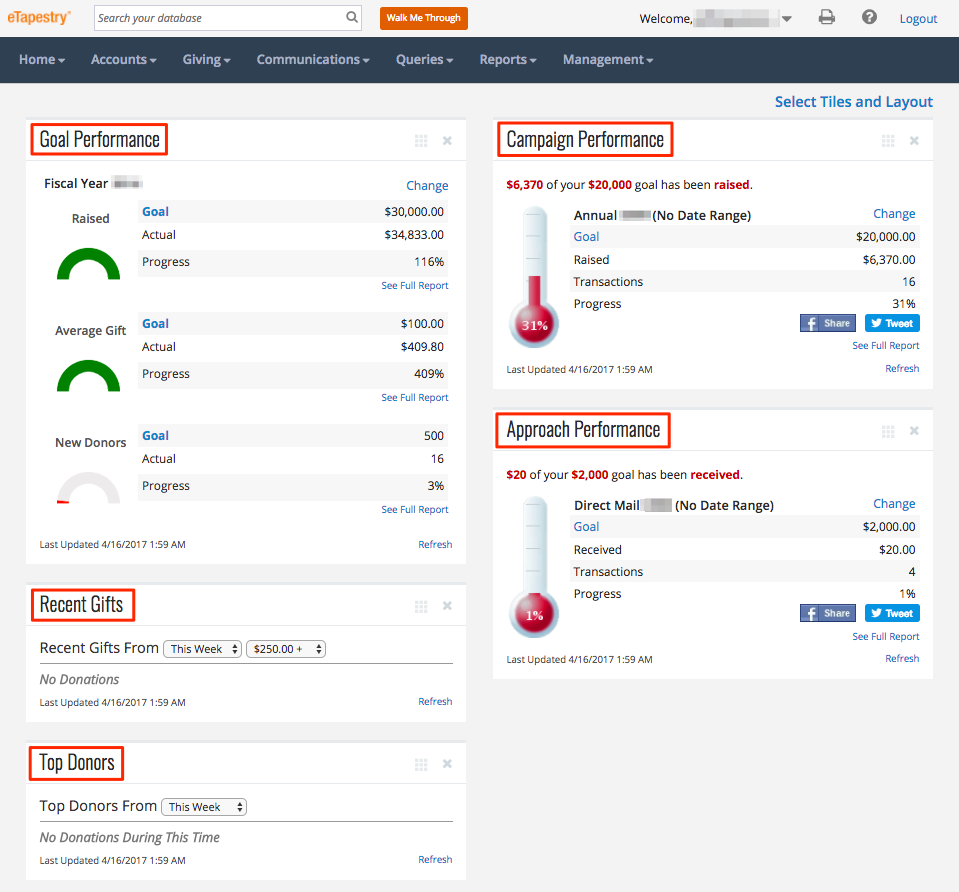
Home Dashboard Tiles
Every user can set up their home dashboard according to their own preferences without impacting other users. There are several home dashboard tiles to choose from.
You can modify your tiles by selecting “Select Tiles and Layout” from the top right corner beneath your navigation bar on the home tab.
We recommend adding the following dashboard tiles:
- Top Donors
- Recent Gifts
- Goal Performance
- Campaign Performance
- Approach Performance
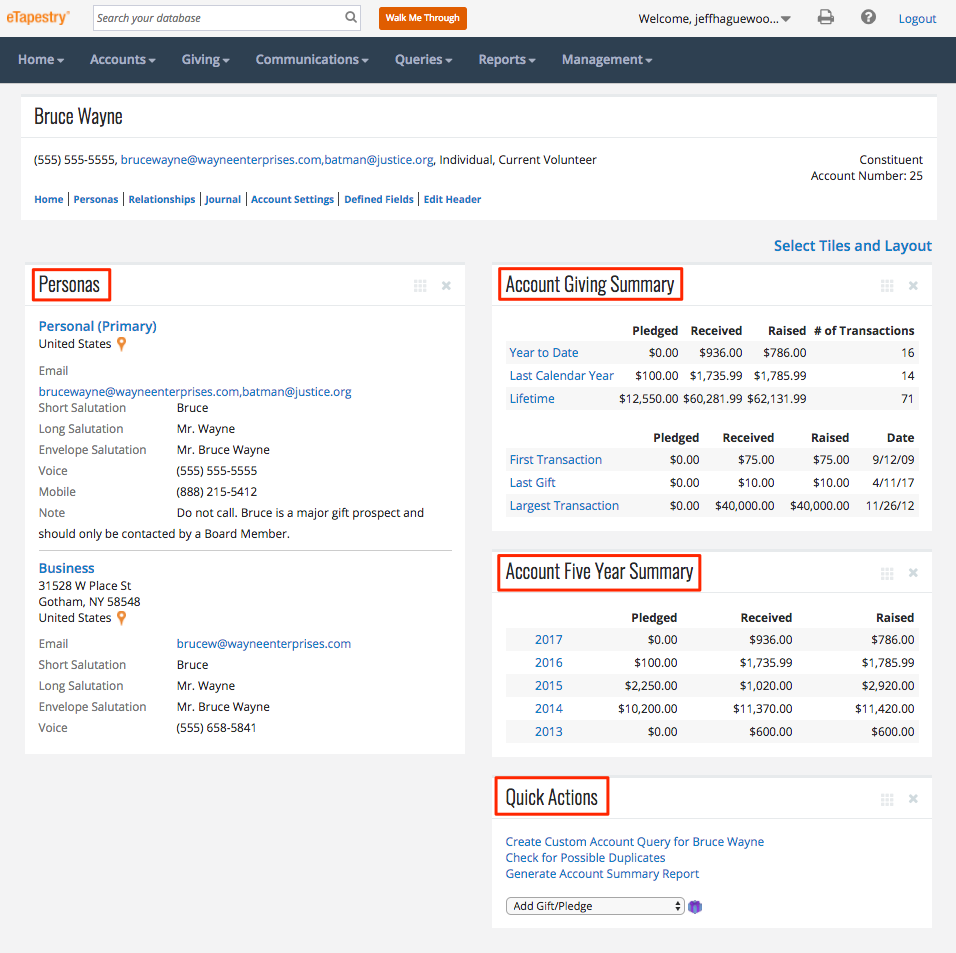
Account Dashboard Tiles
Similar to the Home Dashboard, each user can modify the tiles on the account summary page. Choose from tiles like Personas, Account Giving Summary, and data enrichment results like Wealth Rating and Social Media Finder.
For standard users, display these basics:
- Personas
- Account Giving Summary
- Account 5 Year Summary
- Quick Actions
For organizations that add spouses to household relationships, display Household—instead of Account—Giving Summary and Household 5 Year Summary.
Journal View
The data in an account’s Journal can also be modified to create a cleaner visual experience for a user. While security groups (see step 2) are the only way to limit the rows available (one row per journal entry) in the journal, you can add or remove columns to display data for each journal entry.
Select “Choose Columns” to edit the layout of the journal.
The columns you select here will impact your view of every constituent’s journal in the database. You can always revert to default settings by selecting “Restore Defaults” from any constituent’s journal.
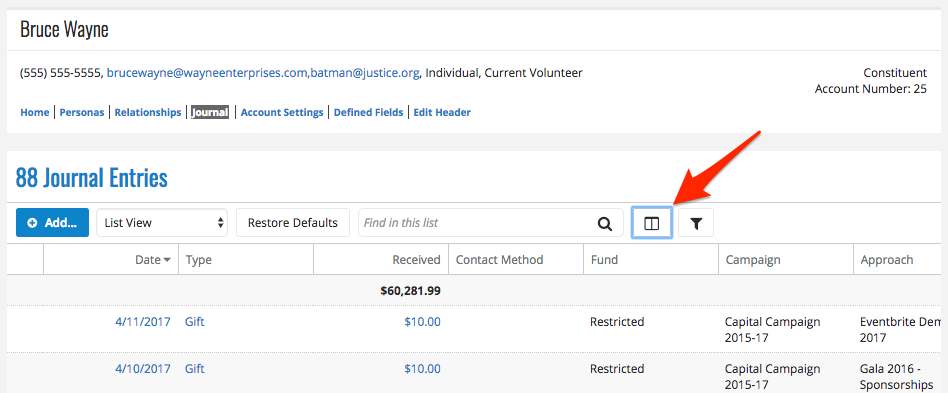
The default journal view is well suited for most standard users. At the least, we recommend adding “Contact Method” to the default journal view to better distinguish the types of interactions you have with a constituent.
Pro Tip: For organizations that add spouses to household relationships, select the dropdown for “List View” in the Journal and switch to “Household List View” to see all journal entries for all household members in a single view.
4. Invest in new user training
This may be a little self-serving because we offer services for new user training, but it is still important, no matter where you get training. Your new users need to build proficiency and experience with eTapestry to be successful with it.
Invest in new user training to avoid user error, inconsistent data, and inaccurate reports. Help your new users get the most out of your investment in eTapestry.
Learn more about designing an effective eTapestry training program here.
5. Review documentation on internal protocols
Finally, provide new users with internal user guides and documentation for your eTapestry database.
If you don’t have internal documentation for your eTapestry database, we recommend you take this opportunity to start drafting some. It is best practice to document data entry and management procedures in user guides so that future users understand how you use the database and how to keep it healthy. Onboarding a new user is a perfect time to get started on these resources.
Not sure where to start with user guides? Here are 15 ideas to get the wheels turning.
As you onboard a new user, update internal user guides and documentation. Keep these resources current and let new users modify and update these guides as they get started with eTapestry. Use the experience of the current new user onboarding process to prepare for the next new user.
How to make new user onboarding a breeze
Turnover is an inevitable part of human resource management. People will come and go from your organization. Your eTapestry database will be the constant through those transitions.
Too often we see eTapestry reconstructed, modified, and reorganized along with each new staff transition. Think about future proofing your eTapestry database so your database maintains its value with each new user.
Future proofing might include:
- User guides for common data entry and data quality procedures
- A training plan that describes how new users will learn the software
- An exit interview template for departing eTapestry users so your organization can understand the most important aspects of their role with eTapestry
A little bit of planning now will make onboarding new eTapestry users easier in the future.
Give your new users the best opportunity to succeed with 1-on-1 training, user guides, and personalized support. Schedule a free consultation with our eTapestry experts to learn more about our new user onboarding packages.
Free Download
The Essential Kit to eTapestry Best Practices
- 4x PDF Guides
- 1x Template/Worksheet
- 1x 60-minute Webinar
- Here we can add a benefit, or we can delete one.
Join the 700+ users that already got their kit!
DOWNLOAD NOW